Tuff Cab, our very own specialist loudspeaker paint, is an enormously versatile, easy to apply water-based acrylic blend. Hard-wearing, it is ideal for finishing your newly-built speaker cabs to give them an easily-maintained professional look, or for sprucing up your trusty warhorses to have them look like they just left the showroom.
A custom-formulated viscous mixture, Tuff Cab lends itself to a huge range of different surface finished depending on how it is applied, so here’s our handy guide for how to quickly and easily obtain the best results.
1) Surface Preparation:
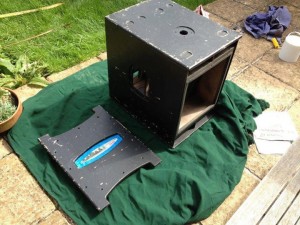
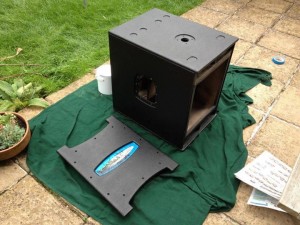
Cab refurbishment – before painting
As with absolutely any surface finish, proper preparation of the surface to be painted is absolutely essential prior to painting. Tuff Cab is designed for optimum adhesion to bare timber, and as a water-based mixture it’s important to make sure that there are no traces of oil or grease present. A little bit of light sanding is usually advisable to remove surface contamination; bear in mind that this will leave traces of dust behind, which you will need to remove by wiping the surface with a clean, slightly damp cloth. No primer is required before applying the Tuff Cab – best results are achieved painting directly onto bare wood. Some people like to use a watered down mix of Tuff Cab (approx 50:50 with tap water) as a primer/base coat, and apply this by spraying or rolling with a non-textured roller, this helps the paint key into the surface, but is not essential.
Although designed primarily for application to timber, Tuff Cab does offer good adhesion to a range of other porous materials, and works well with MDF and natural wood. ABS, polypropylene and other plastics do not offer a suitable surface for Tuff Cab, so we not advise to attempt refinishing such items in this way. MDF and plywood will readily accept Tuff Cab, some resin, epoxy, plastic and solvent-based wood fillers will impair adhesion over the filled area.
 Handy Hint: If you do use plastic/solvented fillers, a thin coat of PVA glue can be brushed over the affected zone, this will help seal any solvents, and prime the surface, significantly improving adhesion in these problem areas.
However we recommend avoiding the use of this type of filler if at all possible. For covering screw holes, we have had good results from mixing standard wood filler with PVA glue. The glue hardens the filler, making it less prone to flaking, and seals it at the same time. Some paint finishes (particularly two-pack polyester paints) will not provide good adhesion for Tuff Cab, and it is advisable to sand these down to bare wood prior to painting. Any cellulose base paint must be completely removed prior to applying Tuff Cab.
2) Painting:
Tuff Cab’s viscous finish is specifically designed for roller application, ideal for a fast, easy, professional results. Other methods of application (such as brush or spray) are also possible, but these may not yield optimum results, and can require specialist equipment and considerable experimentation to achieve an acceptable finish. For this reason, we recommend roller application.
Tuff Cab is best applied at room temperature – avoid painting in an exceptionally cool environment (below 12°C) as the drying time increases significantly, excessive temperatures (above 25°C) can result in the Tuff Cab surface drying too quickly. Within this temperature range, the first coat will usually dry in around 30-60 minutes (dependent on application thickness and temperature – in a cool environment, up to 2-4 hours is not unknown), subsequent coats will take a little longer. A second heavy, textured coat may take up to 24 hours to fully dry in cool conditions.
Painting in the heat: On a hot summer’s day it may be very tempting to get all your speakers out in the garden and give them a fresh coat of paint. We advise you try to pick a slightly cooler day. Summer heat with temperatures around 30°C, the paint can dry in as little as 10-15 minutes, sometimes making it difficult to finish a panel with an even coat, rapid drying time like this will tend to increase the possibility of roller marks from the edges of the roller. With the paint drying whilst you are rolling it on, it is possible also for the texture to become a little ‘spiky’ making the surface feel very rough, almost like sandpaper.
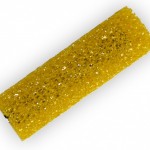
Honeycomb Roller TUFFROLLER01
For a textured finish, Tuff Cab can be applied using a honeycomb roller. The 4″ roller is ideal for small jobs, as it takes minimal paint to wet the roller, and you can dip the roller straight into the tin, no need for a paint tray!
We recommend applying a relatively heavy coat and then rolling in both directions to evenly distribute the paint. Less rolling will give a more pronounced stippled finish, more thorough rolling will gradually flatten the texture and yield a more moderate texture finish. When using the textured roller it is best to roll steadily and smoothly, applying excessive pressure is likely to leave marks at the edges of the roller, and rolling too fast can cause a rough spiky texture. Once the paint is spread across a panel, gradually reduce the pressure on the roller, so that the last few rolls are very gently, almost like you are pulling the roller along with your fingertips.
For larger speakers and panels, you may find it is quicker to simply pour on a small amount of Tuffcab, and use a 9″ textured roller to quickly spread the paint across the panel. With a 9″ roller you can often coat a panel in less than half the time of a 4″ roller.
Use of both 4″ and 9″ rollers together allows quick coverage of large panels, and the ability to work around corners, edges and ports.
If you prefer a smoother finish this can be achieved by applying tuffcab with a standard fluffy polyamide pile roller.
 Practise first: Before you start refurbishing old speakers, or painting new speakers, we strongly recommend a practise run on an offcut. Slightly different textures can be obtained by varying the amount of paint applied, the type of roller, the speed of rolling and to what extent you repeat the rolling to flat the paint.
Two to three coats of Tuff Cab are usually enough to provide adequate protection and a suitable surface finish for most applications, and depending on the temperature, you can apply this within a 24 hour period and have a ‘touch-dry’ finish. When touch-dry it is possible to handle speakers and move them around, but we do not recommend using them straight away, it can take up to a week for the paint to fully cure and harden, longer in cool conditions.
If you need the paint to cure quicker, once it is touch-dry you can use an infra-red heater, such as an electric patio heater. Do not use a heater on freshly painted surfaces as may dry the paint too quickly, causing cracks to appear in the surface. Avoid positioning the heater too close to speaker cabinets, and ensure you follow the manufacturers recommended minimum operating distance for your heater.
Once fully cured, your speakers will be road-ready.
3) Cleaning and Storage:
Whilst wet, Tuff Cab is water-soluble, and your painting equipment (along with any unwanted paint splashes and spillages) can be cleaned with cold tap water; simply rinse under running cold water until the water runs clear and the equipment is clean. As with any water-based paint, ensure that Tuff Cab is not exposed to extremes of temperature in storage – it must be stored no lower than 5°C, and preferably no higher than 25°C.
Storage below 5°C can damage the chemical structure, preventing the paint from curing and adhering when used. If damaged in this way, the paint will appear to dry as normal, but it bonding properties will have been severely impaired and the paint may peel off.
Long term storage outside of recommended temperature range can adversely affect the product structure, composition and performance. Product must be kept in a tightly sealed container, stored out of direct sunlight. Tuff Cab has a recommended shelf life of 6 months, but if kept at standard room temperature, the shelf life can be up to 18 months. In part-used containers of Tuff Cab, spraying a very light misting of water over the top of the Tuff Cab in the container prior to re-sealing for storage can help alleviate skinning-over. If you find you have applied a little too much water, just pour it out or mix it back into the paint before use. Repeated addition of water will affect the viscosity, and the final finish, so minimal water should be used for consistent results.
 Handy Hint: You dont need to wash your roller our between coats, just wrap it in a plastic bag, or cling film to avoid exposure to the air, and then take the plastic off when doing the next coat – the paint and roller will stay fresh for up to 3-4 days under the plastic saving you cleanup time!
Cab refurbishment – All done!
Related articles: https://blog.bluearan.co.uk/new-tuff-cab-pro-just-arrived/
Technical Information:
Physical Properties:
Total Solids % : 40-50
pH : 5.0 – 7.0
Film Appearance : variable Satin-Matt (Tuff Cab Pro) to Satin-Gloss (Tuff Cab Standard)
Minimum Film Forming Temperature: 5°C
Coverage Rough Finish: 2-3 m2 per kg
Coverage Smooth Finish: 4-6 m2 per kg
Health & Safety:
Tuff Cab is non-toxic and is not harmful if handled sensibly. It should not, however, be ingested. Care should be taken to prevent contact with skin and eyes. In case of contact with eyes, thoroughly rinse with water. No adverse affects are known resulting from contact with skin, however it is recommended to use disposable gloves to minimse exposure. The coating is water based and therefore non-flammable. Spillage can be absorbed with sawdust or other suitable absorbent material. Small quantities may be washed away with water according to Local Authority Regulations. Fumes are low-odour, and breathing apparatus is not required, however it is recommended to use Tuff Cab in a well ventilated area.
Want to share your experiences of Tuff Cab? Let us know! Leave a Comment below…
