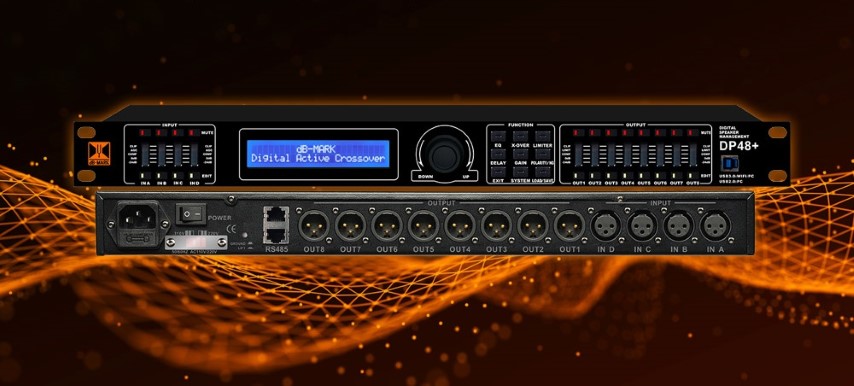
So, we’ve just received a delivery of some of the newly updated DP plus series processors from dB-Mark . We thought we’d take a quick look at some of the new features on the updated model, as there are a few changes compared with the previous model. One of the most obvious is the addition of a TCP/IP port on the back of the unit, which allows direct connection to a network without the need for the UTR485 adaptor. We’re going to explore this new functionality and explain the set-up procedure.
TCP-IP Setup Guide
First you need a network, and you need to connect your dB-Mark processors to the same network as the computer that you wish to control it from, using standard Ethernet cables.
Connect the mains cables and then power up the devices.

You will need to ensure that the IP addresses do not conflict with any other devices on the network, as the processors do not support DHCP to dynamically assign IP addresses. In a more complex network, you may need your network administrator to allocate IP addresses for you to use. The default IP address is 192.168.1.10. Usually this wont clash with other devices, as your router/switch will typically start allocating IP addresses in sequence starting at 192.168.0.1. If you want to use two or more dB-Mark units on the same network, you will need to change the IP address of the additional units.

Press System to enter to Set-up Menu, and then using the jog wheel, scroll to option 7 ‘TCP/IP Set’ – then push in the jog wheel to select this option.

Press the jog wheel again to select ‘1. IP Address set’

The unit will now display the current IP address. You can use the jog wheel to set the IP Address. The IP Address is made up of four sections, press the jog wheel to move between each section, and once you are on the last section, rotate the jog wheel to select your desired IP address.

Once you are happy with the IP address, press and hold the jog wheel for 1 second to store the IP address, then press EXIT to return to the previous menu.
If using multiple units, its useful to change the device names to differentiate the units. Use the jog wheel to scroll through to ‘3 Device Name’, and then press the jog wheel to select this option.

Using the jog wheel, you can enter a suitable name, and then press and hold to store the device name.

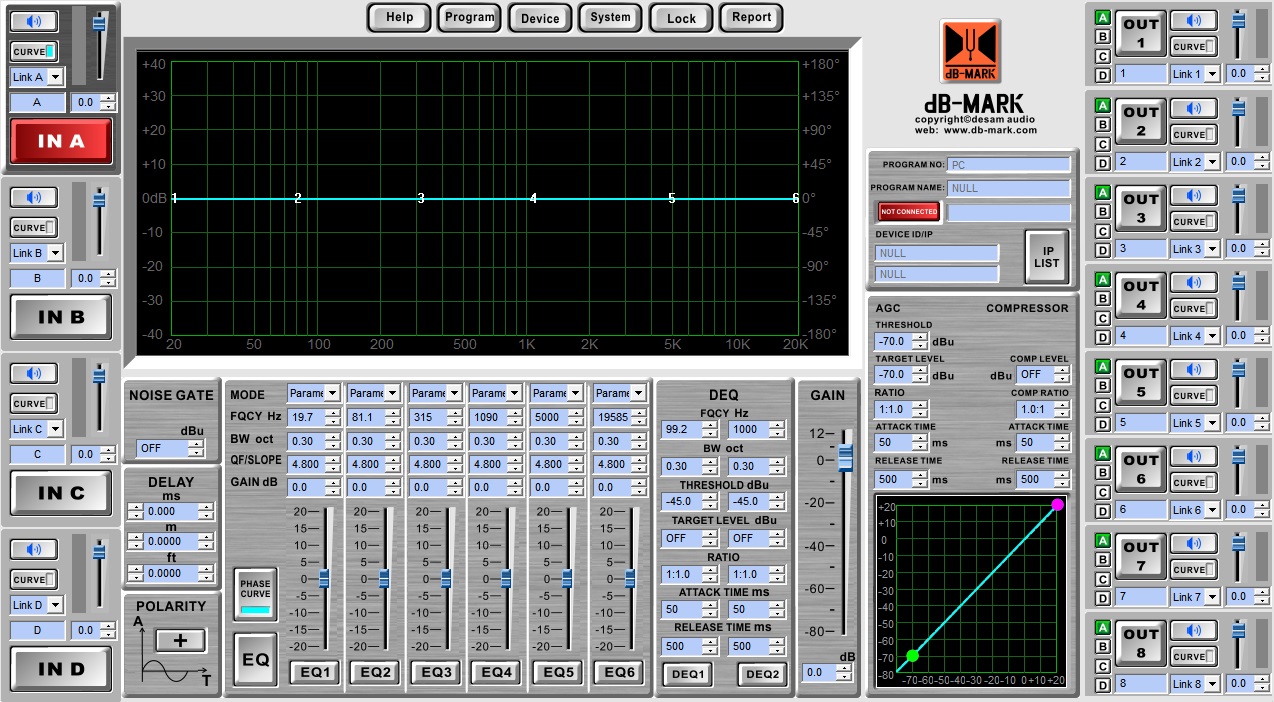
You should repeat the process of setting IP addresses and Device Names for as many units as you have on your network. Once you have completed the setup for your units, you can access them from a suitable device, such as laptop or PC thats on the same network as the dB-Mark devices, and you can do this without the need to install any software on your PC, you can simply open any standard (modern) web browser and enter the IP address of the unit you want to access into the address bar of the browser. A control panel will appear on the screen, and you then need to click on ‘Connect’ to enable the control panel to edit settings on the processor. This will lock out the front panel of the processor, and transfer control to the interface on the PC.
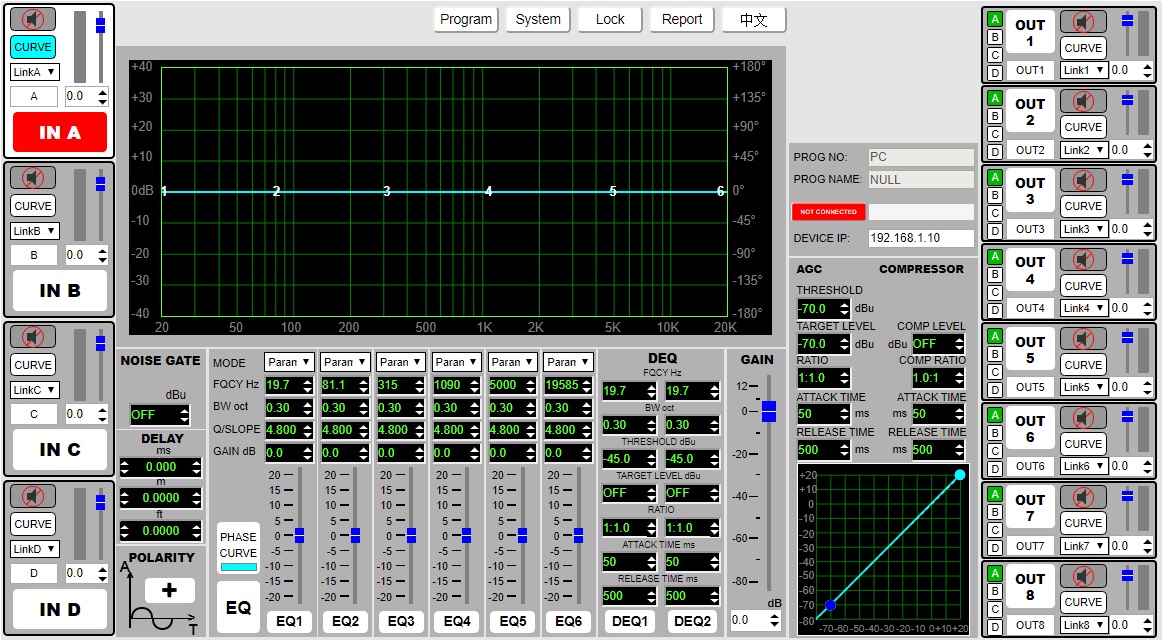
As you can see, the web-based interface (above) is almost identical to the software application for Windows (below), and therefore enables you to have precise control over every single parameter with a graphical representation by “dialling in” remotely from any suitable device on the network with a web browser.